เขียน Python GUI ด้วย Tkinter ep1 - Introduction
S T A C K P Y T H O N-
 Isara
Isara
- March 1, 2021

Tkinter นั้นย่อมาจาก TK Interface เป็น library สำหรับการพัฒนา GUI ที่ติดมากับ python ตอนคุณลง(standard library) มีการเรียนรู้ที่ค่อนข้างง่ายสำหรับมือใหม่ การใช้งานไม่ซับซ้อนตรงตัว
Photo: realpython.com
ใน python มี GUI library หลายตัวแต่ tkinter เป็นหนึ่งในตัวที่นิยมมากตัวหนึ่งด้วยความที่มันง่าย และ cross platform สามารถใช้ได้ทั้ง MacOS, Linux, Windows โดยส่วนใหญ่แล้วจะเป็นตัวเลือกที่น่าสนใจสำหรับคนที่พึ่งเรียนพื้นฐานของ python เสร็จแล้วอยากพัฒนาโปรแกรมขึ้นมาสักตัว
GUI นั้นใช้พัฒนาสำหรับ Desktop แอพ แต่ถ้าต้องการเปิดได้บนทุกอุปกรณ์ไม่ว่าจะเป็น Desktop, Mobile, Tablet เป็นต้น แนะนำคอร์สเรียนสดพัฒนาเว็บไซต์ตัวต่อตัว (Private Class) สำหรับเจ้าของธุรกิจหรือคนทั่วไปที่สนใจครับ: Website Development 101
จุดประสงค์
- เข้าใจกฎและข้อควรระวังพื้นฐาน
- สามารถสร้างโปรเจคและวาง widget แบบง่ายๆใน tkinter ได้
- bind widget เข้ากับ function ได้
- เข้าใจการใช้งานของ method .pack() .grid() .place()
- เข้าใจ option หรือ parameter พื้นฐานของ method ด้านบน
- เข้าใจการใช้งาน Frame เพื่อแยกหน้าต่างโปรแกรมเป็นสัดส่วน
- สามารถนำไปประยุกต์ใช้ออกแบบโปรแกรมที่ต้องการได้
พื้นฐานที่ควรระวัง
การ Import tkinter
อย่างที่ได้เขียนไปว่ามันมีติดมาอยู่แล้วดังนั้นเราเลยสามารถ Import มาใช้งานได้เลย
เราจะใช้ Tkinter สำหรับ python2 และ tkinter สำหรับ python3
import Tkinter as tk #python2 import tkinter as tk #python3import error handling
หากเป็นการนำ code อื่นมารันที่มีปัญหาเรื่องการ import ชื่อ library ที่แตกต่างกันเพราะการเปลี่ยนชื่อ เราสามารถนำเรื่อง exception handling มาช่วยได้try: from Tkinter import * except ImportError: from tkinter import *หลีกเลี่ยงการใช้ wildcard importfrom tkinter import *การ import แบบด้านบนสามารถใช้ได้แต่จะ import ทุกอย่างของ tkinter เข้ามาซึ่งอาจเกิดปัญหา Class
อย่าตั้งชื่อไฟล์ตามชื่อ libraryเวลาที่เราหัดใช้ library อะไรใหม่ๆ ผู้ใช้บางคนอาจจะตั้งชื่อไฟล์ตาม library ที่ใช้เช่นเวลาที่คุณจะลอง tkinter คุณอาจตั้งชื่อไฟล์ว่า tkinter.py สิ่งที่เกิดขึ้นคือ python จะไม่สามารถหา library ตัวนั้นได้เพราะมันจะไปหาไฟล์ตัวที่คุณสร้างกเอง (คุณจึงรัน tkinter ในไฟล์อื่นใน project เดียวกันไม่ได้ด้วย)้
Labels - ข้อความlabel = tk.Label(text='Hello world')Button - ปุ่มกดb1 = tk.Button(text="Click me!")Entry - กล่องข้อความบรรทัดเดียวe1 = tk.Entry()Text - กล่องข้อความหลายบรรทัดt1 = tk.Text()
ลองสร้างหน้าต่าง tkinter กันก่อนแบบง่ายๆไม่กี่บรรทัดกัน
import tkinter as tk app = tk.Tk() app.title('Hello world') app.mainloop()เราจะทำการ import เข้ามา สร้าง Instance ของ tkinter และตั้งชื่อหน้าต่าง โปรแกรมว่า Hello world และใช้ method mainloop() จะได้โปรแกรมออกมาาการใส่ widgets ต่างๆลงในโปรแกรมในการใส่ widget จะมีขั้นตอนดังนี้คือ
- ประกาศ widget instance ขึ้นมาก่อน
- นำ widget ใส่ในโปรแกรมด้วย geometry method
ทดลองใส่ widget ลงไปในโปรแกรมimport tkinter as tk app = tk.Tk()button = tk.Button(text='click me!') button.pack()app.mainloop()นอกจากนี้แล้วยังมีการวางอีกแบบคือเราจะรวมทุกอย่างในบรรทัดเดียวเลยtk.Button(text='click me!').pack()ก็จะได้ผลลัพธ์แบบเดียวกัน แต่ความแตกต่างคือการประกาศแบบล่างจะไม่เก็บตัวแปร หากต้องการเปลี่ยนแปลงหรือดึงค่าอะไรจาก widget เราจะไม่สามารถทำได้เลยเพราะ ไม่มีตัวอ้างอิงถึงนั่นเอง(เราไม่ได้เก็บใส่ตัวแปร เราจะอ้างอิงถึงยังไงนั่นเอง)
การนำ function bind กับ widget
จากข้างบนเราจะได้ปุ่มกดมาแล้ว เราจะทำให้ปุ่มกดเรียกฟังก์ชั่นง่ายๆที่ทำการ print ข้อความออกมา เราจะสร้างฟังก์ชั่นนั้นขึ้นมาก่อนดังนี้
def print_something():
    print('Button bind working!')
เราจะทำการผูกเข้า button โดยการเพิ่ม parameter ที่ชื่อ command ให้กับ button ดังนี้
button = tk.Button(text='click me!', command=print_something)การ bind function ที่มี parameter
จากข้างบนจะเป็นฟังก์ชั่นเปล่าๆ หากเราต้องการใส่ argument เข้าไปด้วยเราจะไม่สามารถเขียนแบบด้านล่างได้ เพราะจะเป็นการเรียกใช้ฟังก์ชั่นทันที ซึ่งฟังก์ชั่นของเราจะทำการรัน method print_something จึงมีการ print ข้อความแต่เนื่องจาก method ไม่มีการ return ค่า ค่าที่ออกมาจะเป็น None ดังนั้นจึงเปรียบเสมือนว่าเราใส่ command=None
def print_something(text):
    print(text)
button = tk.Button(text='click me!', command=print_something("print this"))ซึ่งเราจะแก้ไขด้วยการใช้ lamda expression เข้ามาช่วย (ดูคลิปสอน lambda ที่นี่)
command= lambda :print_something('print this')
เพียงเท่านี้ code ของเราก็จะสามารถทำงานได้ตามปกติแล้ว
ตัวอย่าง code ของหมวดนี้ที่เสร็จแล้ว
import tkinter as tk

def print_something(text):
    print(text)

app = tk.Tk()
button = tk.Button(text='click me!', command= lambda :print_something('print this'))
button.pack()
app.mainloop()
Tkinter Geometry
เป็น method กลุ่มหนึ่งใน libraly ที่ใช้สร้าง gui อย่าง tkinter ประกอบด้วย method สามตัวคือ pack grid และ place ซึ่งจะมีรูปแบบการจัดวางที่มีความแตกต่างกัน

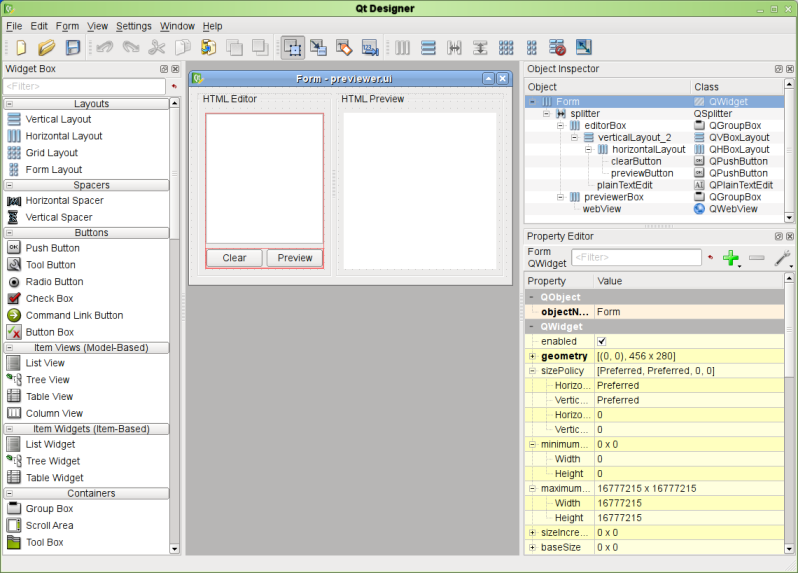
ใน GUI Library ตัวอื่นเช่น QT จะมี QT Designer อำนวยความสะดวกช่วยให้เราสามารถออกแบบโปรแกรมแบบลากวางได้ เพิ่มความสะดวกเป็นอย่างมากแต่ใน tkinter นั้นเราจำเป็นต้องเขียนโค้ดเพื่อออกแบบหน้าตามันเอง เราจึงต้องมีความเข้าใจในการใช้งาน
ใน tkinter จะมีการ layout อยู่สามแบบนั่นคือ
- Pack
- Grid
- Place
<tkinterInstance>.pack(parent, option)สำหรับการจัดวางแบบแรกจะเน้นไปที่การจองพื้นที่ใน block หรือ parent นั้นๆ จะมีเหมาะอย่างยิ่งกรณีที่เราต้องการเพิ่ม widget ในแนวตั้งหรือแนวนอนโดยยังไม่รู้จำนวนที่ชัดเจน เนื่องจาก pack จะมีการแบ่งพื้นที่เป็นเท่าๆกันให้ โดยการจัดวางแบบ pack นั้น หากมีการเรียงลำดับที่ต่างกันจะทำให้ผลลัพธ์ที่ออกมาต่างกันด้วย
import tkinter as tk
root = tk.Tk()

tk.Button(root,text='A', bg = "yellow").pack()
tk.Button(root,text='B', bg = "yellow").pack()
tk.Button(root,text='C', bg = "yellow").pack()
tk.Button(root,text='D', bg = "yellow").pack()

root.mainloop()
จะเห็นว่า .pack จะทับๆกันไปเรื่อยๆ โดยหากจะให้เห็นภาพเราต้องทำความรู้จัก parameters 3 ตัวของ pack ก่อนนั่นคือ side, fill, expand
side
คือการเลือกจองด้านที่ widget จะอยู่มีอยู่ 4 ด้านคือ ขึ้น ลง ซ้าย ขวา (tkinter.TOP LEFT RIGHT BOTTOM) โดยพื้นฐานหากเราไม่ใส่เข้ามา tkinter จะกำหนดให้ว่าเป็น TOP (ด้วยเหตุนี้ Aจึงอยู่บนสุด)
หากเราลองใส่ argument side=tk.LEFT ดูจะเห็นว่า widget จะเรียงเป็นแนวนอน
.pack(side=tk.LEFT)fill, expand
สำหรับสอง parameter นี้จะเข้าใจได้ดีกว่าหากเราพูดร่วมกัน fill จะมี parameter สามตัวคือ tkinter.X Y BOTH ขณะที่ expand น้้นจะรับค่าเป็น True กับ False
fill จะว่าด้วยเรื่องของการขยาย widget ไปยังแกน x y หรือทั้งคู่ (ขยายขึ้นลงนั่นแหละ) แต่จะขยายในอาณาเขตของมันเท่านั้น
expand คือการอนุญาติให้ widget ขยายไปยังช่องว่างที่เหลือที่ไม่ถูกจัดสรรให้กับ widget ใดๆ
ตัวอย่างเพื่อให้เห็นภาพ
การจัดวางแบบ side=tk.LEFT อย่างเดียว
การใช้ expand อย่างเดียวจะทำให้ center widget เปลี่ยนตำแหน่งตามขนาดหน้าต่างแต่เพราะไม่มี fill ขนาดจึงเท่าเดิม
ใช้ side ร่วมกับ fill แต่เนื่องจากไม่มี expand มันจึงขยายได้แค่ด้านบน (เพราะจองพื้นที่ด้านบน แต่ซ้ายขวามีจำกัด)
fill=tk.X, expand=True
การใช้ fill=tk.BOTH , expand=True
สำหรับตัวอย่างโดยละเอียดของ fill, expand ลองดูที่ link นี้ได้
น่าจะพอเห็นภาพของ parameter ซึ่งสำหรับการออกแบบหน้าตาโปรแกรมเราจะยังข้ามไปก่อน เนื่องจากเรายังไม่ได้เรียนรู้การใช้ Frame แต่เราพอจะเดาหน้าตาโปรแกรมออกแล้ว (ลองคาดเดาหน้าตาโปรแกรมของ code ข้างล่างก่อนนำไปรันหรือดูผลลัพธ์สิ)
import tkinter as tk
root = tk.Tk()

tk.Button(root,text='A', bg = "yellow")pack(side = tk.LEFT, fill = tk.BOTH, expand = True)
tk.Button(root,text='B', bg = "yellow")pack(side = tk.TOP, fill = tk.BOTH, expand = True)
tk.Button(root,text='C', bg = "yellow")pack(side = tk.LEFT, fill = tk.BOTH, expand = True)
tk.Button(root,text='D', bg = "yellow")pack(side = tk.LEFT, fill = tk.BOTH, expand = True)
tk.Button(root,text='E', bg = "yellow")pack(side = tk.LEFT, fill = tk.BOTH, expand = True)
tk.Button(root,text='F', bg = "yellow")pack(side = tk.LEFT, fill = tk.BOTH, expand = True)
tk.Button(root,text='G', bg = "yellow")pack(side = tk.LEFT, fill = tk.BOTH, expand = True)
tk.Button(root,text='H', bg = "yellow")pack(side = tk.LEFT, fill = tk.BOTH, expand = True)
tk.Button(root,text='I', bg = "yellow")pack(side = tk.LEFT, fill = tk.BOTH, expand = True)

root.mainloop()
<tkinterInstance>.grid(parent, option)import tkinter as tk
root = tk.Tk()
tk.Button(root,text='A', bg = "yellow").grid(row=0, column=0, sticky='NSEW')
tk.Button(root,text='B', bg = "yellow").grid(row=0, column=1, sticky='NSEW')
tk.Button(root,text='C', bg = "yellow").grid(row=0, column=2, sticky='NSEW')
tk.Button(root,text='D', bg = "yellow").grid(row=1, column=0, sticky='NSEW')
tk.Button(root,text='E', bg = "yellow").grid(row=1, column=1, sticky='NSEW')
tk.Button(root,text='F', bg = "yellow").grid(row=1, column=2, sticky='NSEW')
tk.Button(root,text='G', bg = "yellow").grid(row=2, column=0, sticky='NSEW')
tk.Button(root,text='H', bg = "yellow").grid(row=2, column=1, sticky='NSEW')
tk.Button(root,text='I', bg = "yellow").grid(row=2, column=2, sticky='NSEW')
root.mainloop()แต่แน่นอนว่าโปรแกรมของเราจะมีความกว้างยาวที่ไม่เท่ากัน การจะเป็นให้ widget สามารถก้าวข้าม row หรือ column ของตัวเองได้นั้นเราจะมี parameter ที่ชื่อ rowspan และ column span ไว้แก้ไขกรณีนี้
tk.Button(root,text='A', bg = "yellow").grid(row=0, column=0, sticky='NSEW', columnspan=2)
# tk.Button(root,text='B', bg = "yellow").grid(row=0, column=1, sticky='NSEW')
tk.Button(root,text='A', bg = "yellow").grid(row=0, column=0, sticky='NSEW', rowspan=2) # tk.Button(root,text='D', bg = "yellow").grid(row=1, column=0, sticky='NSEW')
ใน pack หากเราต้องการให้ widget ขยายตามขนาดโปรแกรมเราจะใช้ fill คู่กับ expand ซึ่งใน grid เราจะใช้คำสั่ง row/column configure(parent, row/col, weight)
tk.Grid.columnconfigure(root, 0, weight=1)
tk.Grid.columnconfigure(root, 1, weight=1)
tk.Grid.columnconfigure(root, 2, weight=1)
tk.Grid.rowconfigure(root, 0, weight=1)
tk.Grid.rowconfigure(root, 1, weight=1)
tk.Grid.rowconfigure(root, 2, weight=1)for x in range(3): tk.Grid.columnconfigure(root, x, weight=1) for y in range(3): tk.Grid.rowconfigure(root, y, weight=1)
<tkinterInstance>.place(parent, option)import tkinter as tk
root = tk.Tk()
tk.Button(root,text='A', bg = "yellow").grid(row=0, column=0, sticky='NSEW')
tk.Button(root,text='B', bg = "yellow").grid(row=0, column=1, sticky='NSEW')
tk.Button(root,text='C', bg = "yellow").grid(row=0, column=2, sticky='NSEW')
tk.Button(root,text='A', bg = "yellow").place(x=20, y= 20, anchor='center')
root.geometry("500x500")
root.mainloop()
relx, rely - ตำหน่งการวางของ widget เมื่อเทียบกับขนาดหน้าต่างโดยคดิเป็นเปอเซ็นต์ (0.01-1)
tkinter.Frame(parent, option)import tkinter as tk
root = tk.Tk()
pack_frame = tk.Frame(root)
pack_frame.pack()
tk.Label(pack_frame, text='Pack!', bg="blue").pack(side=tk.LEFT)
tk.Label(pack_frame, text='Pack!', bg="blue").pack(side=tk.LEFT)
tk.Label(pack_frame, text='Pack!', bg="blue").pack(side=tk.LEFT)
grid_frame = tk.Frame(root)
grid_frame.pack()
tk.Button(grid_frame,text='A', bg = "yellow").grid(row=0, column=0, sticky='NSEW')
tk.Button(grid_frame,text='B', bg = "yellow").grid(row=0, column=1, sticky='NSEW')
tk.Button(grid_frame,text='C', bg = "yellow").grid(row=0, column=2, sticky='NSEW')
root.geometry("500x500")
root.mainloop()กิจกรรมที่กำลังจะมาถึง
ไม่พลาดกิจกรรมเด็ด ๆ ที่น่าสนใจ
Python Bundle 2023 สมัครครั้งเดียวเรียนได้ทุกคอร์ส
Event นี้จะเริ่มขึ้นใน April 25, 2023
รายละเอียดเพิ่มเติม/สมัครเข้าร่วมคำอธิบาย
คอร์สเรียนไพธอนออนไลน์ที่เราได้รวบรวมและได้ย่อยจากประสบการณ์จริงและเพื่อย่นระยะเวลาในการเรียนรู้ ลองผิด ลองถูกด้วยตัวเองมาให้แล้ว เพราะเวลามีค่าเป็นอย่างยิ่ง พร้อมด้วยการซัพพอร์ตอย่างดี